Enroll a student with a postpaid billing plan
Enroll a student in a 1:1 course and set up automated postpaid billing — priced per session credit, invoiced on a recurring cycle, with a grace period for late payment.
Written By WiseApp
Last updated About 2 hours ago
Last updated: 2026-07-07
Before you start
A 1:1 course template to enroll into
The student's account (existing), or their name and email (new)
Step 1: Open the Add menu
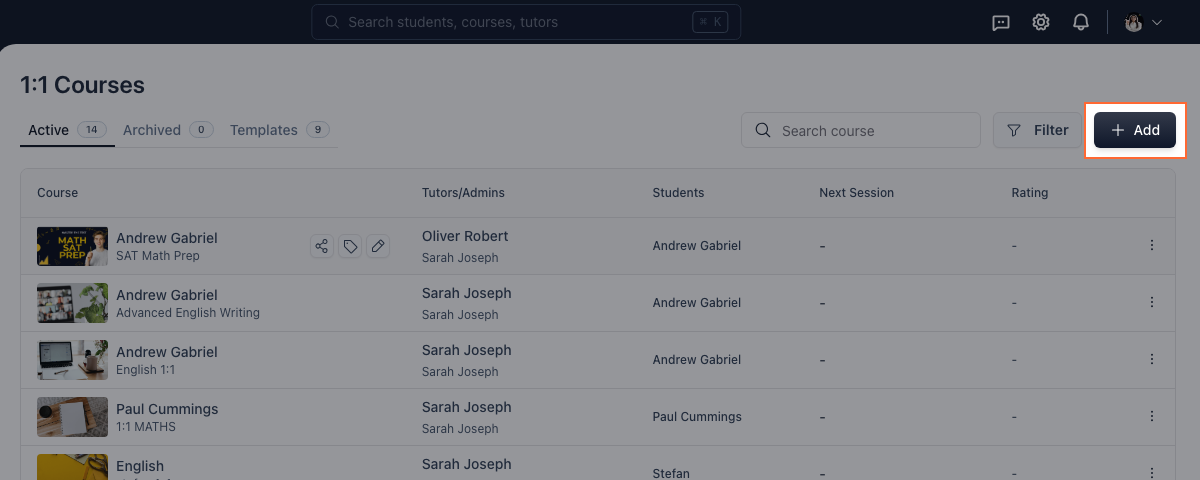
On the 1:1 Courses page, click + Add at the top right.
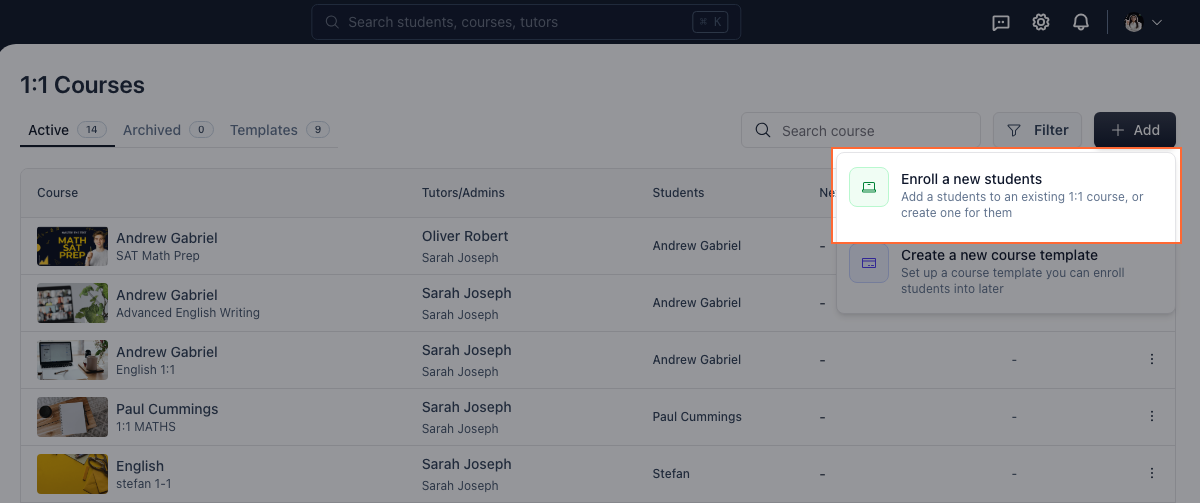
Step 2: Choose Enroll a new students
Select Enroll a new students to add a student to an existing 1:1 course or create one for them.
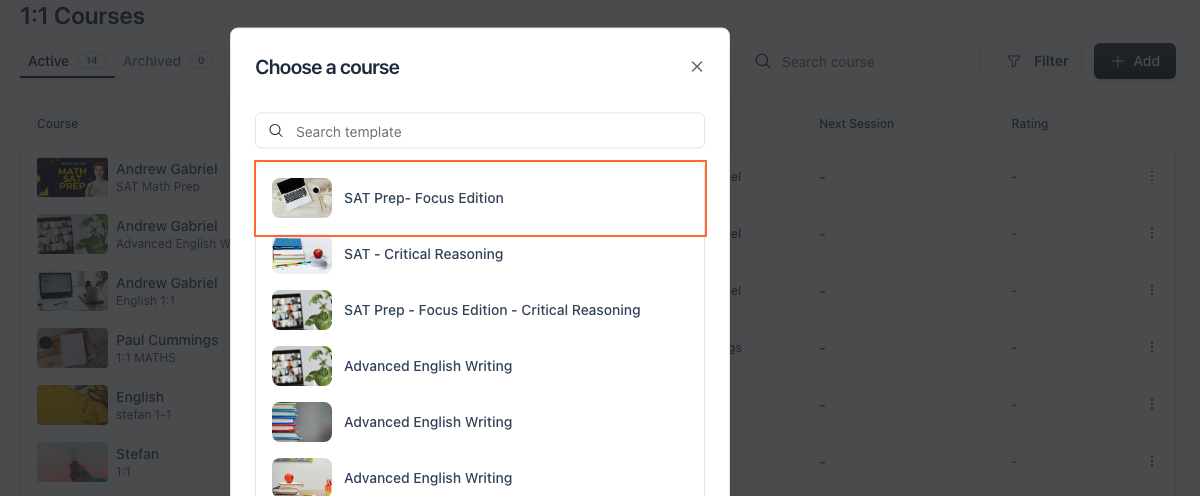
Step 3: Choose a course
Search or browse the list of course templates.
Click the template to enroll into.
Or click + Create a new 1:1 course.
Step 4: Select the student
The wizard opens on Add Students / Parent.
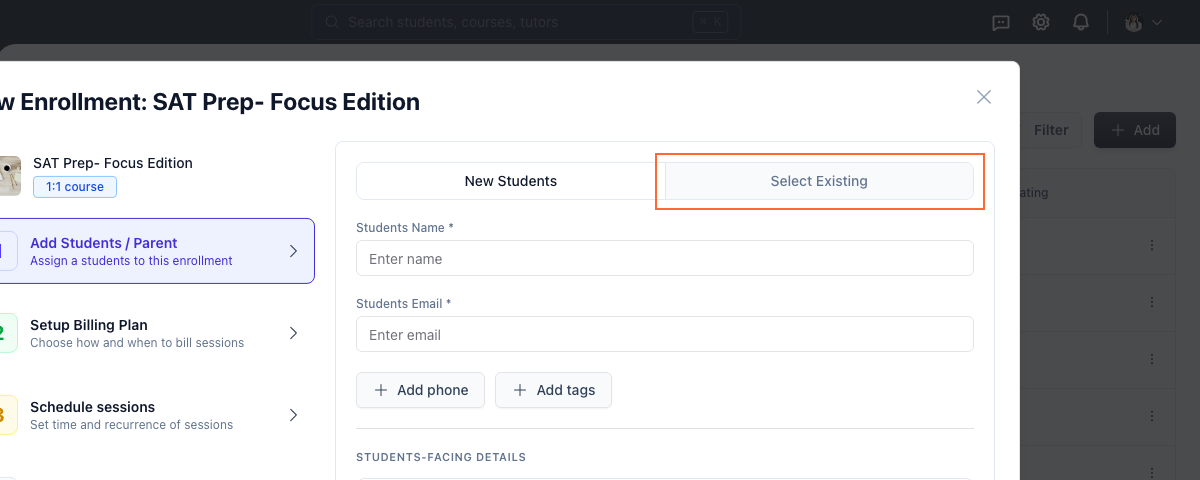
Use New Students to create a student from their name and email.
Or switch to Select Existing to enroll someone already in your institute.
Step 5: Pick the student
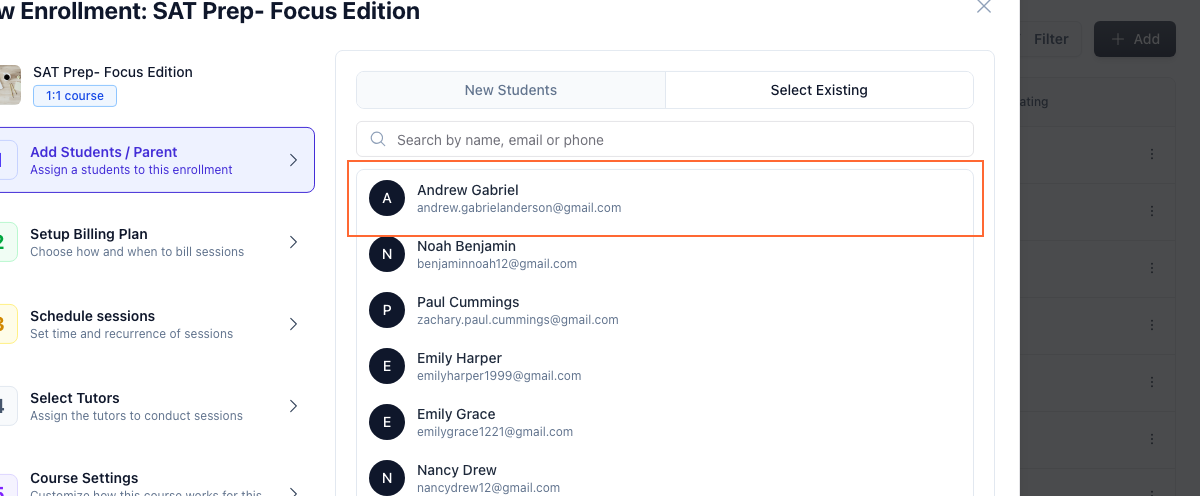
Click the student's name to select them.
Click Next.
Step 6: Open the billing step
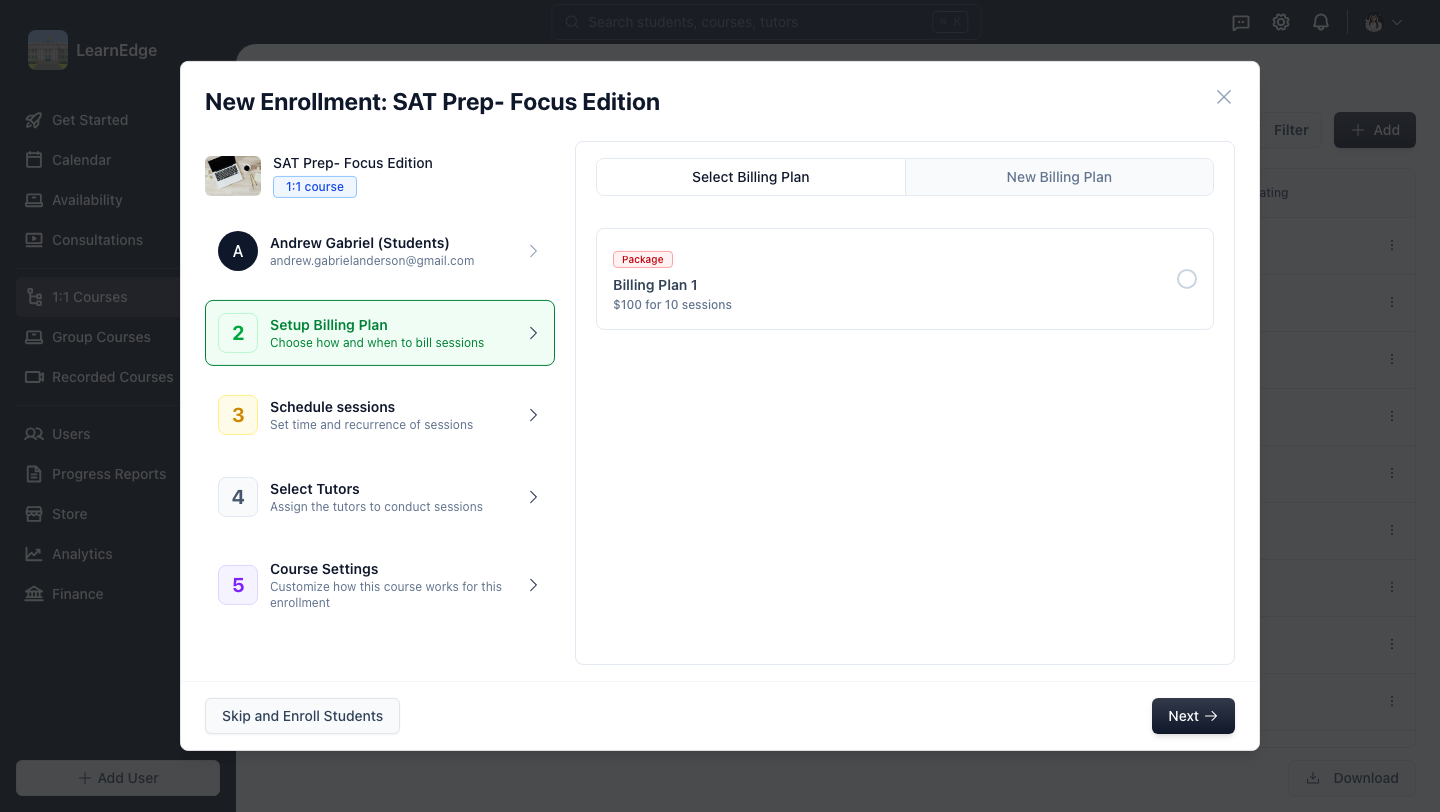
On Setup Billing Plan, choose one of two tabs:
Select Billing Plan — reuse a saved plan template.
New Billing Plan — configure a plan just for this enrollment.
Step 7: Switch to New Billing Plan
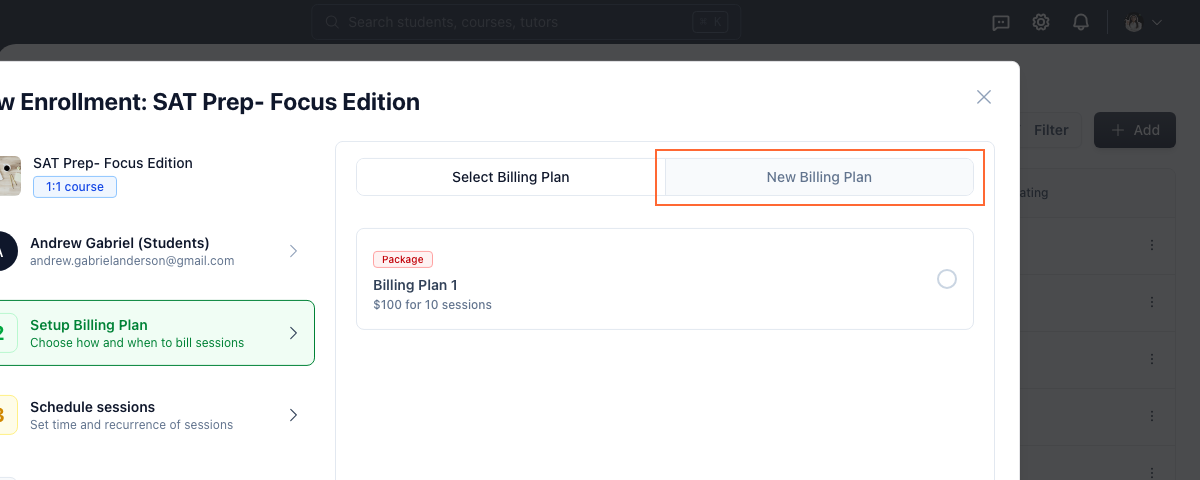
Click the New Billing Plan tab to configure a custom plan for this student.
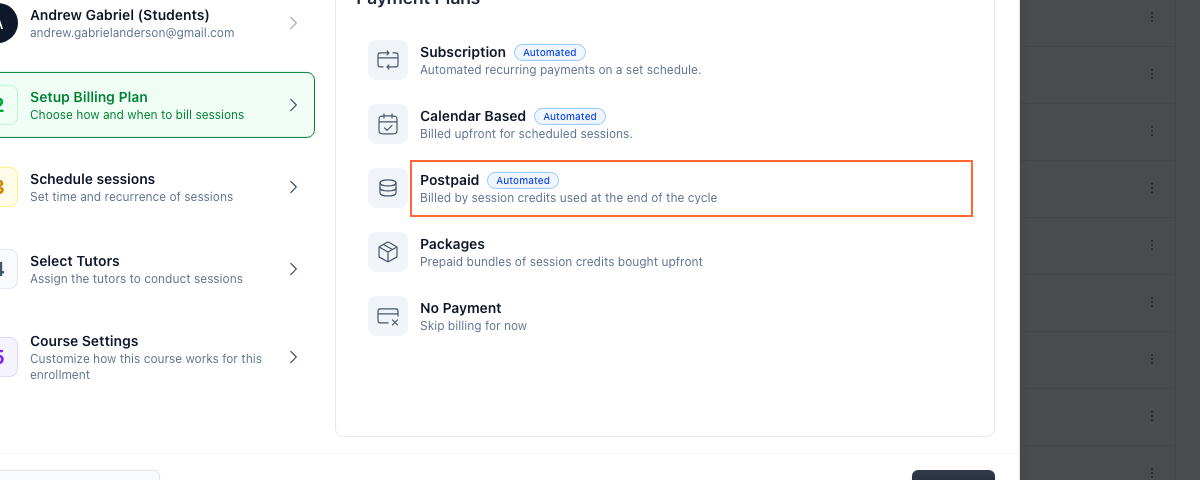
Step 8: Choose Postpaid
Under Payment Plans, choose Postpaid.
The student is billed by session credits used at the end of each cycle (pay as you go).
Step 9: Configure the postpaid plan
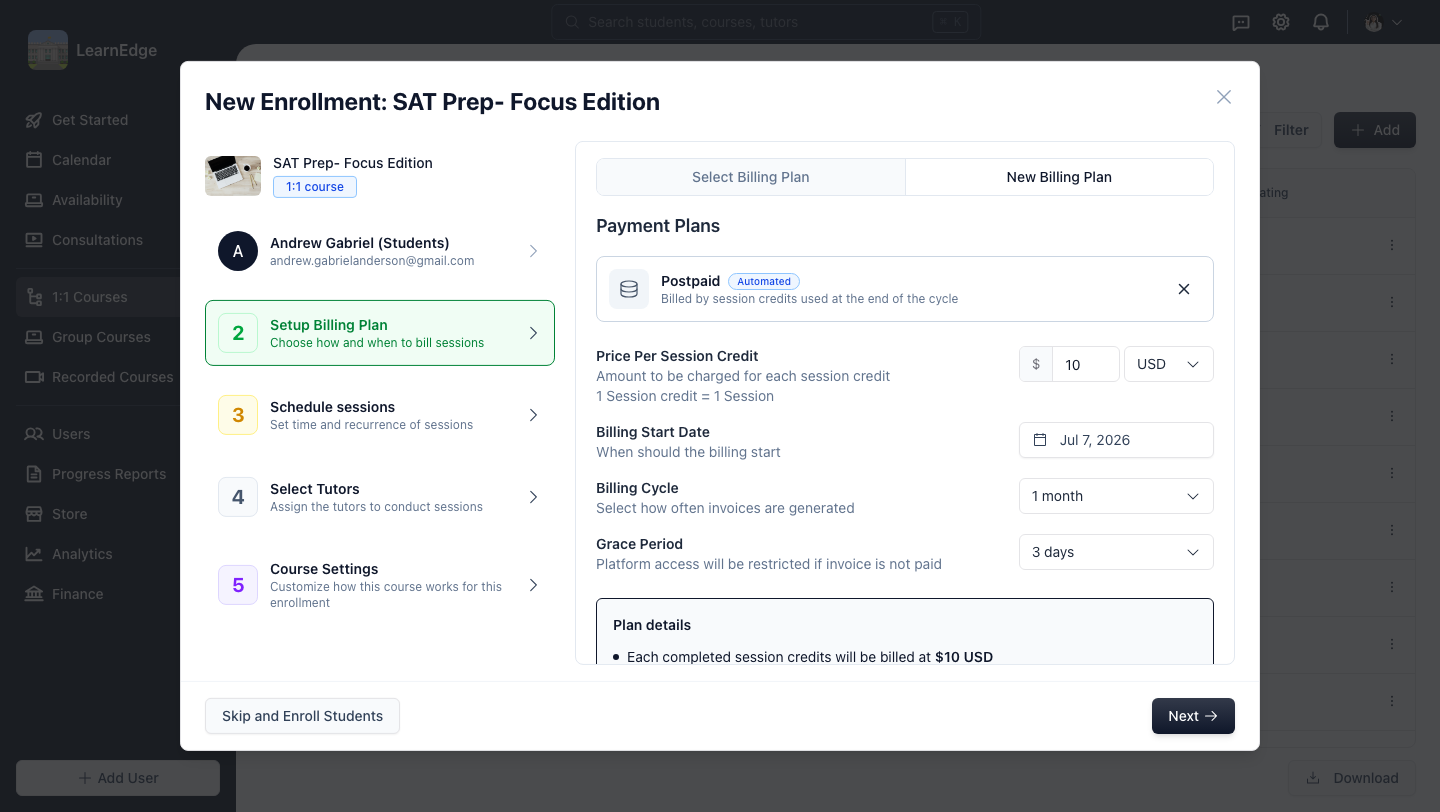
Set Price Per Session Credit — the amount charged for each credit (1 credit = 1 session).
Set Billing Start Date — when billing begins.
Set Billing Cycle — how often invoices are generated, from After every session up to 1 year.
Set Grace Period — how many days (0–10) after an unpaid invoice before the student's platform access is restricted.
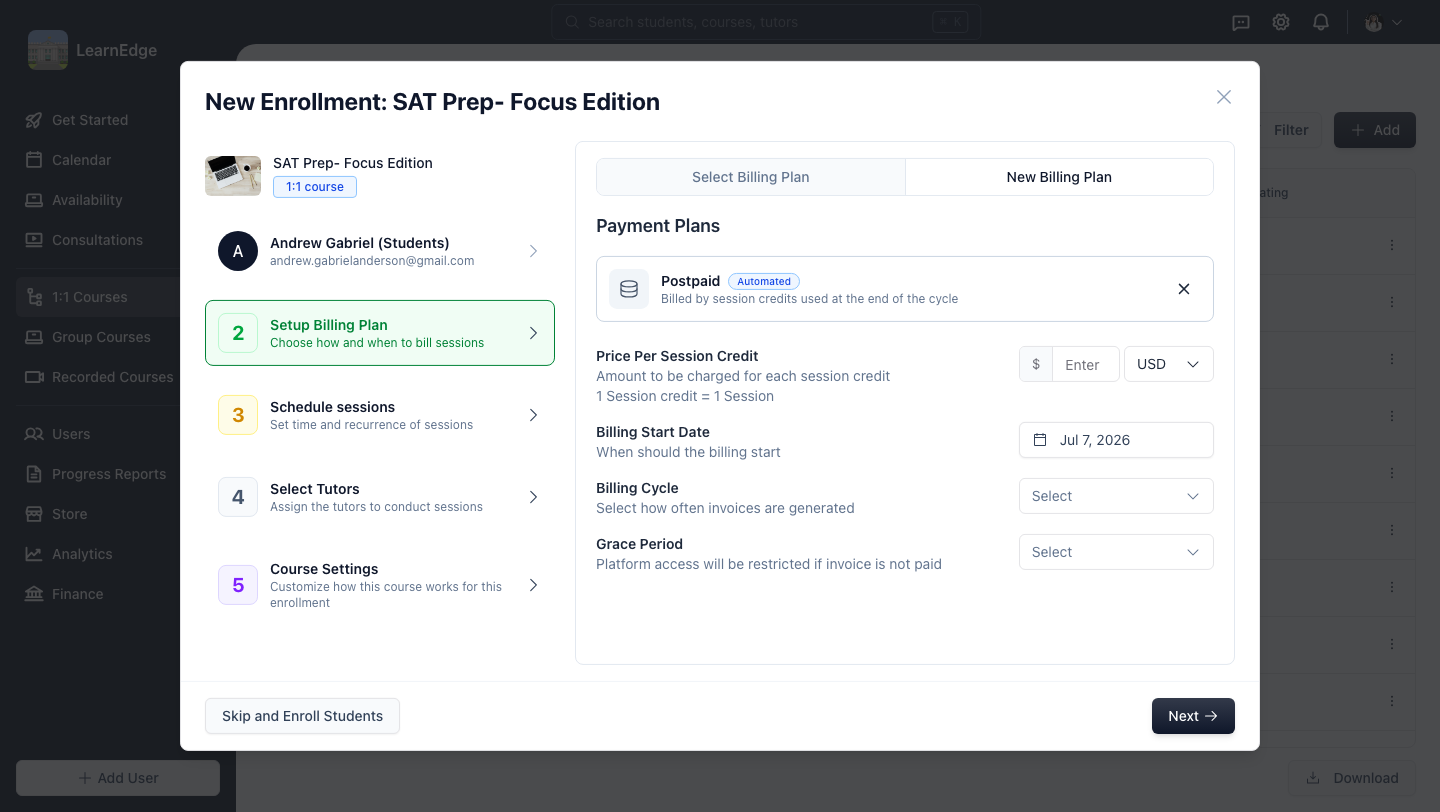
Note: Price Per Session Credit — the amount charged for each session credit (1 credit = 1 session). Billing Start Date — when billing begins. Billing Cycle — how often invoices are generated, from After every session up to 1 year. Grace Period — how many days (0–10) after an unpaid invoice before the student's platform access is restricted.
Step 10: Review the configured plan
Check the summary — this example bills $10 per session credit, invoiced every month, with a 3-day grace period.
Click Next.
Step 11: Schedule sessions
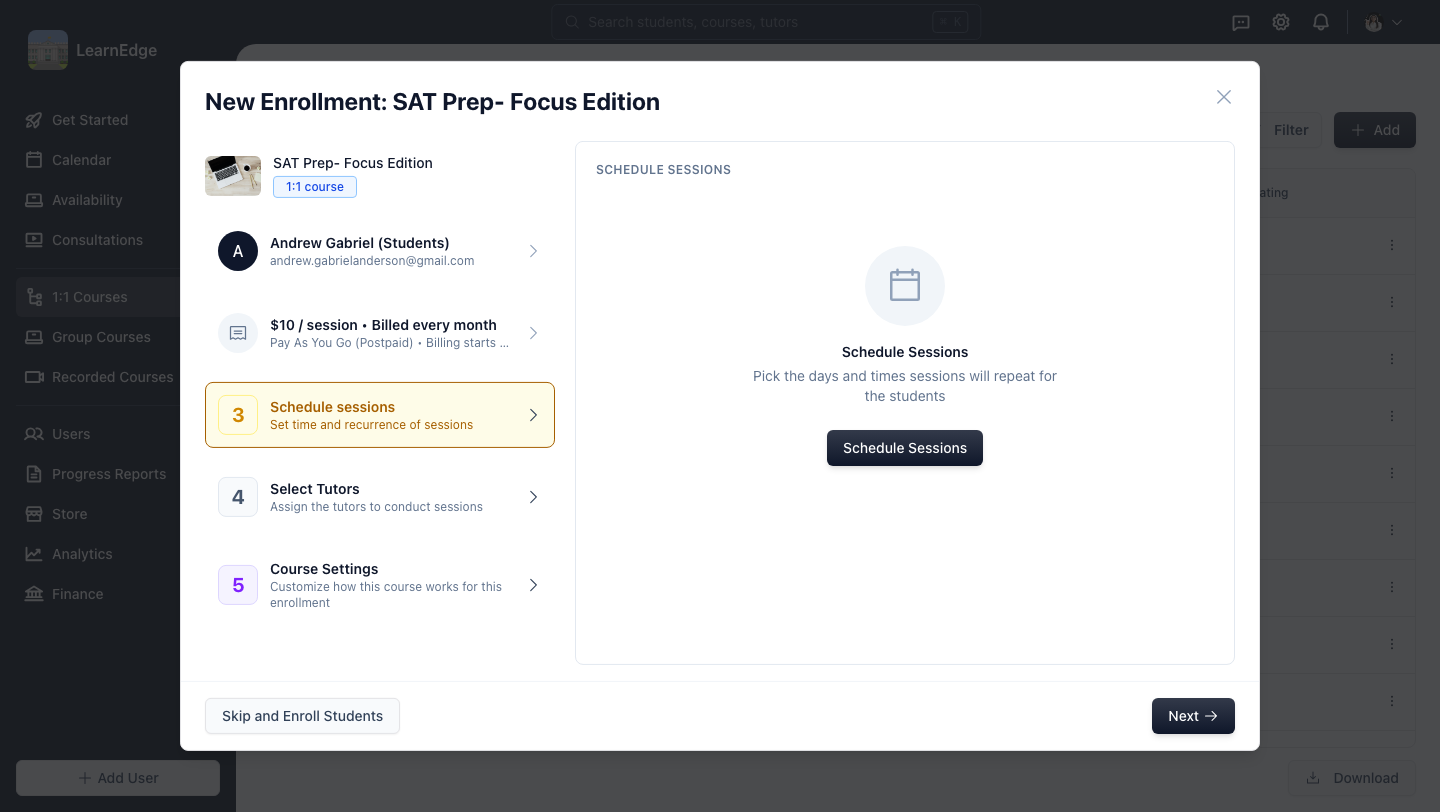
Set the time and recurrence of the student's sessions.
Or leave scheduling for later.
Click Next.
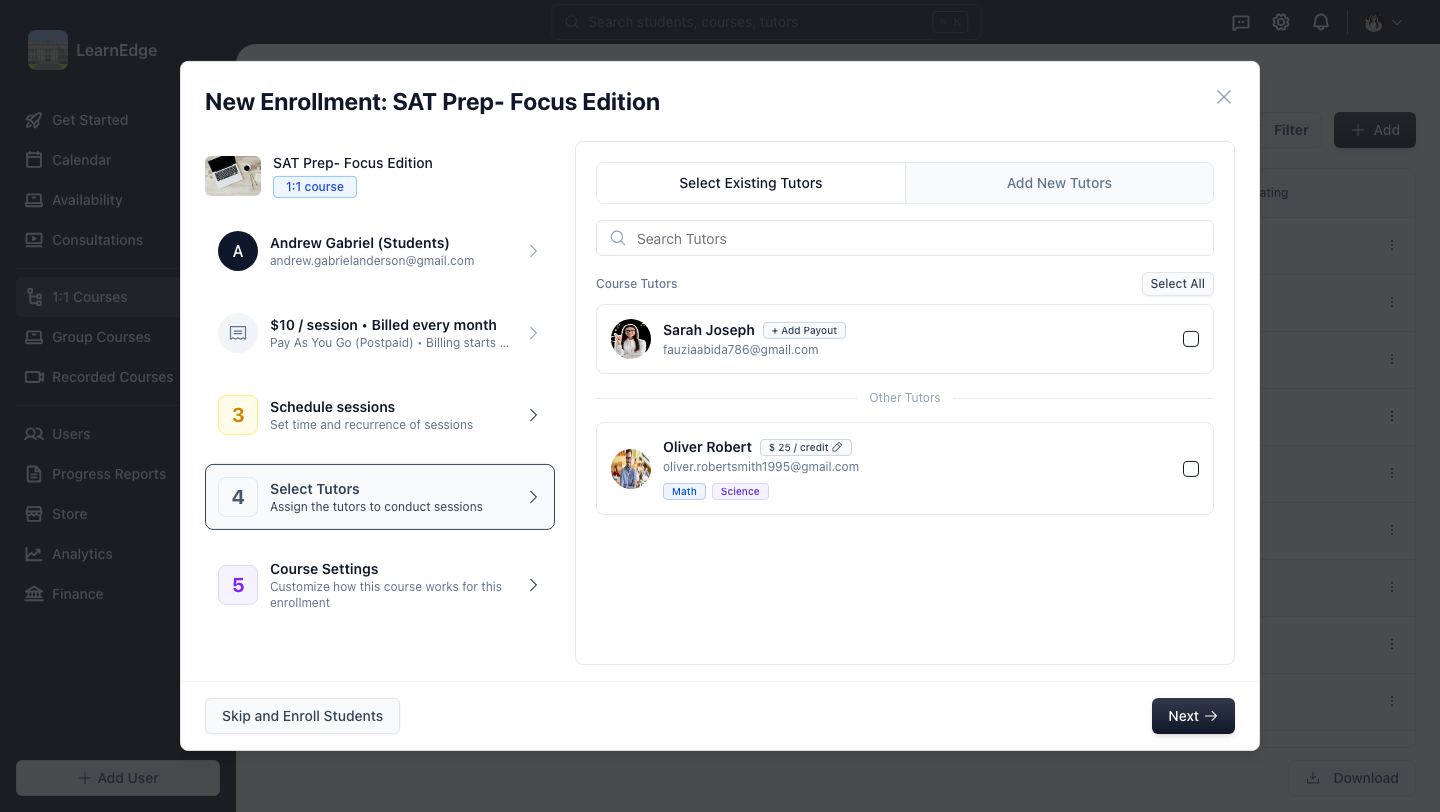
Step 12: Select tutors
Assign the tutor who will conduct this student's sessions.
Click Next.
Step 13: Course Settings — basics
Set the Title and Subtitle — how the course appears for this student.
Add or review the Admin who manages this enrollment.
Toggle Allow sessions when students has 0 credits — disable to prevent tutors starting sessions when the student has no credits left, so unbilled sessions can't happen on a postpaid plan.
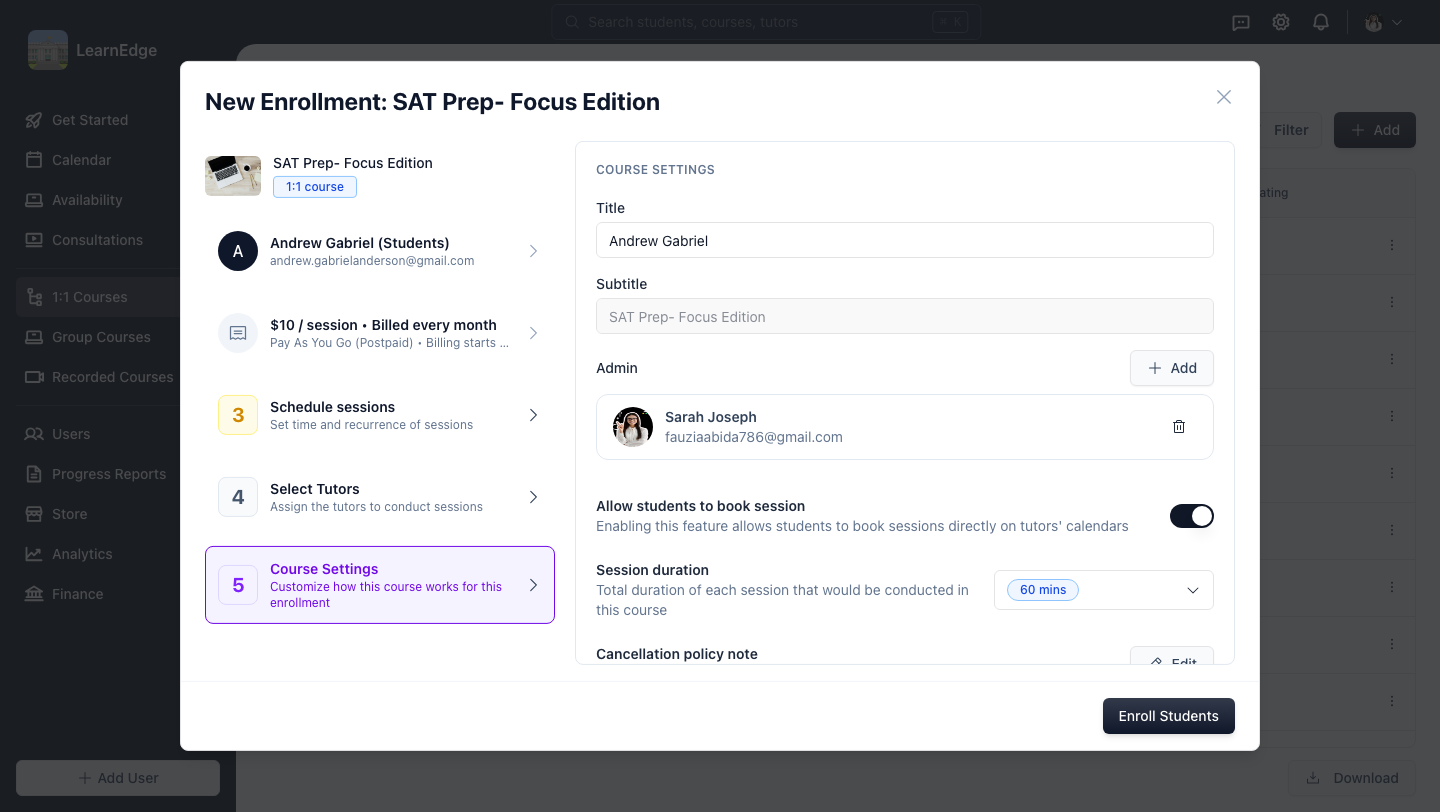
Note: Allow sessions when students has 0 credits — disabling this prevents tutors from starting sessions when the student has no credits left, so unbilled sessions can't happen on a postpaid plan.
Step 14: Course Settings — booking
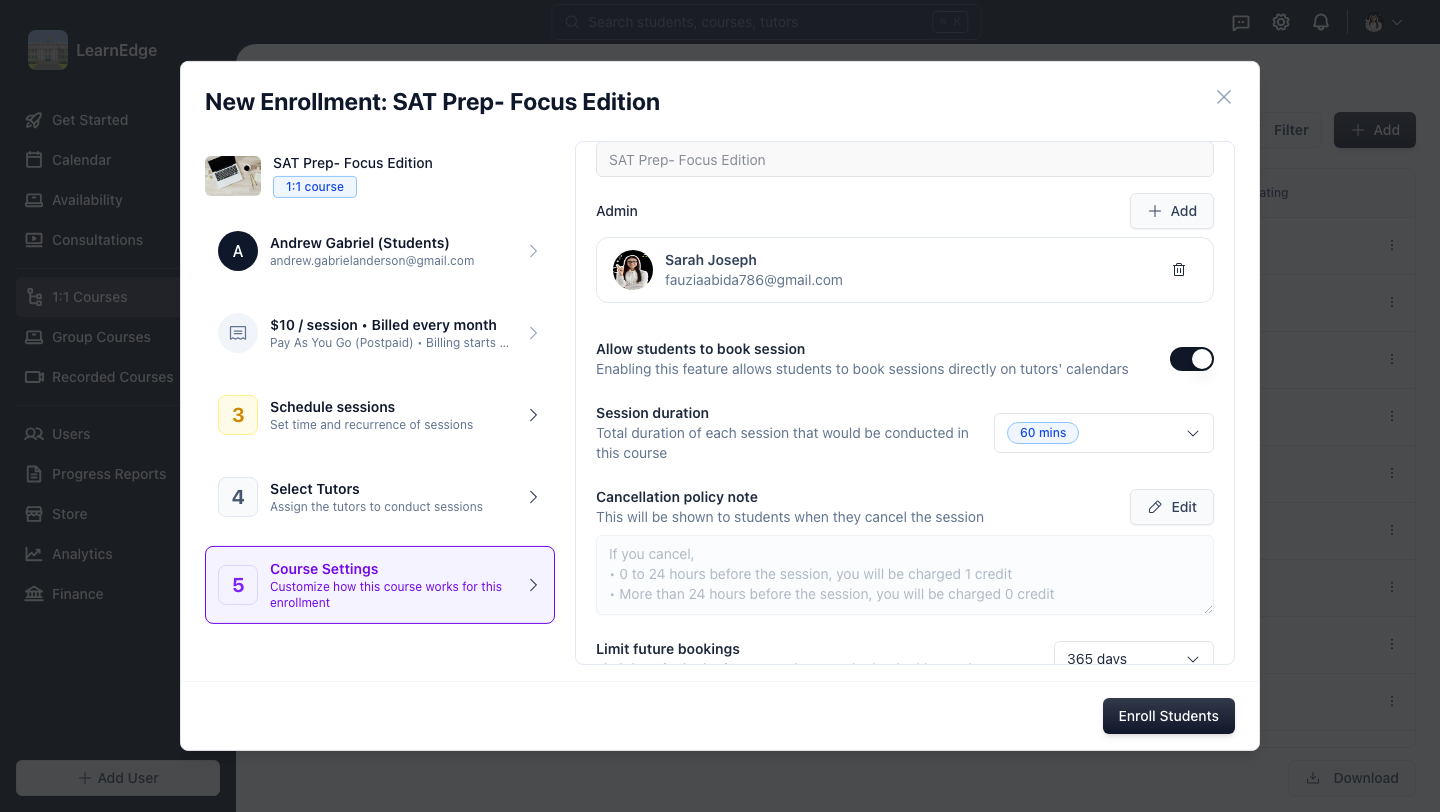
Scroll to the booking controls.
Toggle Allow students to book session to let the student book directly on tutors' calendars.
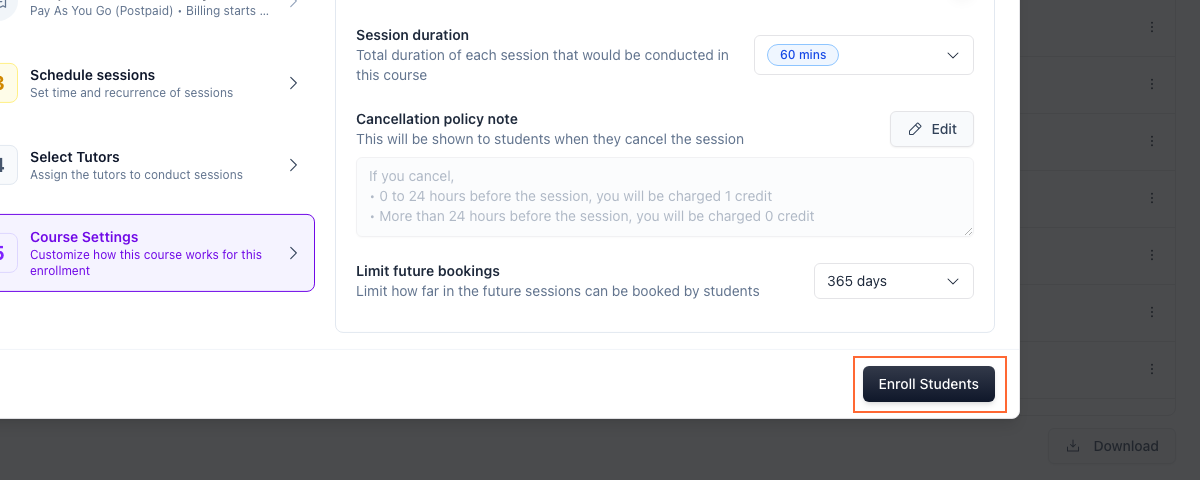
Set Session duration — the total length of each session (60 mins by default).
Step 15: Course Settings — policies
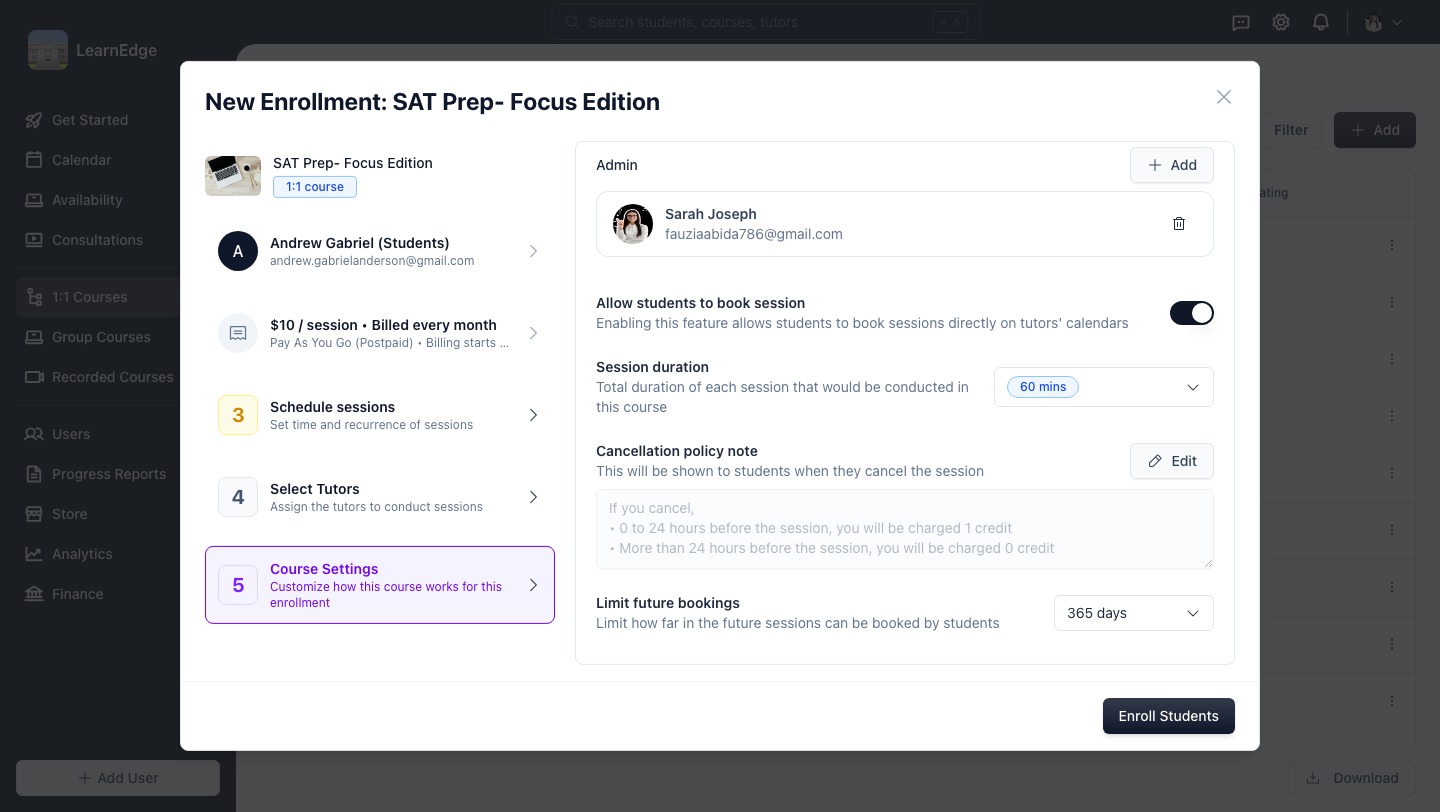
Scroll to the bottom.
Set the Cancellation policy note, shown to students when they cancel a session.
Set Limit future bookings — how far ahead students can book (365 days by default).
Step 16: Enroll the student
Click Enroll Students to complete the enrollment with the postpaid plan attached.